On the mend
I love all my wooly creations. I think there’s something about the amount of time invested in creating something that means we value the item itself more. You wouldn’t know it from the state of one particular old favourite...
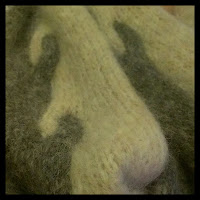
This is the cuff of my Cherry Maple cardigan, which was made back in 2012. I love, love, love this cardigan. I wear it regularly but it’s looking a little ragged these days:


This is the cuff of my Cherry Maple cardigan, which was made back in 2012. I love, love, love this cardigan. I wear it regularly but it’s looking a little ragged these days:

If you look carefully enough, it has been fixed in the past with a different yarn crocheted on the edge but more substantial fixing is needed here to rescue it. I have been wearing this to work in this state. *hangs head in shame* This post is all about how I fixed the cuff so I get another 7 years out of it.
Step 1 - optional initial trim
I trimmed the cuff until I was about 2cm from the start of the ‘not requiring fixing’ rows. This step is terrifying!

Step 2 - picking up stitches
I found a suitable not damaged row, started picking up stitches making I was staying on the same row. No meandering; it’s easily done. I kept going until I had the whole round on there.

Step 3 - unravel the cuff
This bit was fun and frustrating in equal measure, particularly for a jumper as well worn as this. I found a lose end and unravelled to my hearts content all the way to the round I had picked up. This was more bitty than I thought because I had trimmed to start with.

Step 4 - join in new yarn and knit
That pretty much explains the step. Luckily I have some of the original yarn so I used this to knit up the new cuff. A few rounds of stockinette followed by 2x2 ribbing until it was long enough. I then used Jenny’s Surprisingly Stretchy Bind Off to cast off.

Step 5 - Alexa, weave in my ends
She’s not quite that advanced yet but I know she’s working on it. I haven’t woven in the ends yet so no ‘ta daaa’ picture yet. I’ll share soon, might be Friday.
Have you fixed anything you’ve made, or does it languish in a cupboard or drawer?

Comments
Post a Comment